
Maintaining the brakes on your electric bike is crucial for ensuring your safety and the overall performance of your ride. Whether you are an experienced cyclist or new to electric bikes, understanding the importance of brake maintenance and how to address common issues will help you enjoy a smooth and secure riding experience. In this article, we will discuss the significance of maintaining electric bike brakes and highlight some common issues you may encounter.
Importance of Maintaining Electric Bike Brakes
A well-maintained brake system is essential for your safety while riding your electric bike. Here are a few reasons why regular brake maintenance is important:
- Efficient Braking Performance: Well-maintained brakes provide precise and reliable stopping power, allowing you to effectively control your speed and navigate different terrains.
- Extended Brake Lifespan: Regular maintenance and proper adjustment can help prolong the lifespan of your brake components, saving you from costly replacements.
- Improved Riding Experience: Knowing that your brakes are in optimal condition gives you peace of mind, enabling you to fully enjoy your ride without worrying about sudden brake failures or decreased performance.
Common Issues with Electric Bike Brakes
Despite their importance, electric bike brakes can encounter some common issues. Here are a few problems you may come across:
- Squeaking or Grinding Noises: Unusual noises when braking may indicate worn brake pads or misalignment. Regular inspection and pad replacement can address this issue.
- Reduced Braking Power: If you notice your brakes are not as responsive as before, it might be due to worn brake pads, cable stretch, or hydraulic fluid leakage. Promptly address these issues to maintain optimal braking performance.
- Brake Drag: If your brakes feel sticky or don’t release after braking, it could be due to cable tension or misalignment. Adjustments or lubrication may be necessary to resolve this problem.
- Brake Fading: This occurs when the brakes lose effectiveness over prolonged braking periods. It could be caused by overheating brake pads or air in the hydraulic brake lines. Regular inspection and proper cooling techniques can help manage this issue.
Remember, when encountering any issues with your electric bike brakes, it’s always recommended to consult a professional bike technician. They can provide expert guidance and ensure your brakes are properly serviced and adjusted for maximum safety and performance.
Brake Inspection
When it comes to maintaining your electric bike’s brakes, regular inspection is crucial for ensuring their optimal performance and your safety on the road. Here are some key areas to focus on during a brake inspection:
Visual Inspection of Brake Pads
The brake pads are vital components that come into direct contact with the wheel rims or disc rotors to provide stopping power. To inspect them visually, start by examining the thickness of the brake pad material. If the pads have worn down to a thickness of 3mm or less, it’s time to replace them.
Additionally, look for any signs of damage, such as cracks or uneven wear patterns. These can indicate a need for adjustment or replacement. Take note of any debris or foreign objects stuck in the brake pads, as these can affect braking performance.
Checking Brake Cables and Housing
The brake cables and housing are responsible for transmitting your braking input from the brake levers to the braking mechanism. Inspecting them regularly ensures smooth and reliable brake operation. Here’s what to check:
- Examine the brake cables for any fraying, kinks, or signs of rust. If you notice any of these issues, the cables should be replaced.
- Ensure that the brake cable housing is in good condition and securely attached. Look for any cracks, dents, or compression marks. If you find any damage, replace the housing to maintain optimal brake performance.
- Next, check the cable tension. Squeeze the brake lever and observe the movement of the brake calipers or brake pads. They should engage quickly and release smoothly when the lever is released. If the brake lever feels spongy or there is excessive play, it may indicate a need for cable adjustment.
- Lubricate the brake cables and pivot points of the brake calipers or disc brakes regularly to ensure smooth operation and prevent corrosion.
By conducting regular visual inspections of the brake pads and checking the brake cables and housing, you can address potential issues promptly and ensure your electric bike’s brakes are functioning optimally. Remember, if you are unsure or encounter significant problems, it’s always recommended to consult a professional bike technician for expert guidance and assistance.
Adjusting Brake Pads
When it comes to maintaining a safe and efficient electric bike, proper brake adjustment is crucial. Here, we will explore how to adjust the brake pads on an electric bike to ensure optimal braking performance.
Determining Correct Brake Pad Position
The first step in adjusting the brake pads is to ensure they are positioned correctly. Follow these steps:
- Begin by inspecting the brake pads. Look for even wear patterns and check if they are centered on the rim or rotor.
- If the brake pads are not centered, use a wrench to loosen the bolt that holds the brake pads in place.
- Gently adjust the position of the brake pads, aligning them with the rim or rotor. Make sure both brake pads are equidistant from the rim or rotor.
- Once the brake pads are correctly positioned, tighten the bolt to secure them in place.
Making Adjustments for Optimal Braking
After ensuring the brake pads are in the correct position, it’s time to fine-tune the adjustments for optimal braking performance. Follow these steps:
- Squeeze the brake lever to apply the brakes and observe the brake pad-to-rim or brake pad-to-rotor contact.
- If the contact is uneven or the brakes feel weak, adjustments are needed.
- To adjust the brake pads, locate the small adjustment screw near the brake caliper.
- Turn the adjustment screw clockwise to move the brake pads closer to the rim or rotor for increased contact and stronger braking power. Turn it counterclockwise to create more clearance and reduce brake pad contact.
- Test the brakes after each adjustment by squeezing the brake lever and ensuring the pads contact the rim or rotor evenly.
- Repeat the adjustment process as needed until optimal braking performance is achieved.
By following these steps, you can properly adjust the brake pads on your electric bike to ensure safe and reliable braking. Remember, if you are unsure or encounter significant problems, it’s always recommended to consult a professional bike technician for expert guidance and assistance. Your safety on the road is paramount, and well-maintained brakes are essential for a smooth and secure ride.
Brake Cable Adjustment
Checking cable tension
To fix the brakes on an electric bike, it is essential to start by checking the cable tension. Here are the steps to follow:
- Inspect the cable: Check the brake cable for any signs of fraying, kinks, or damage. If you notice any issues, it may be necessary to replace the cable.
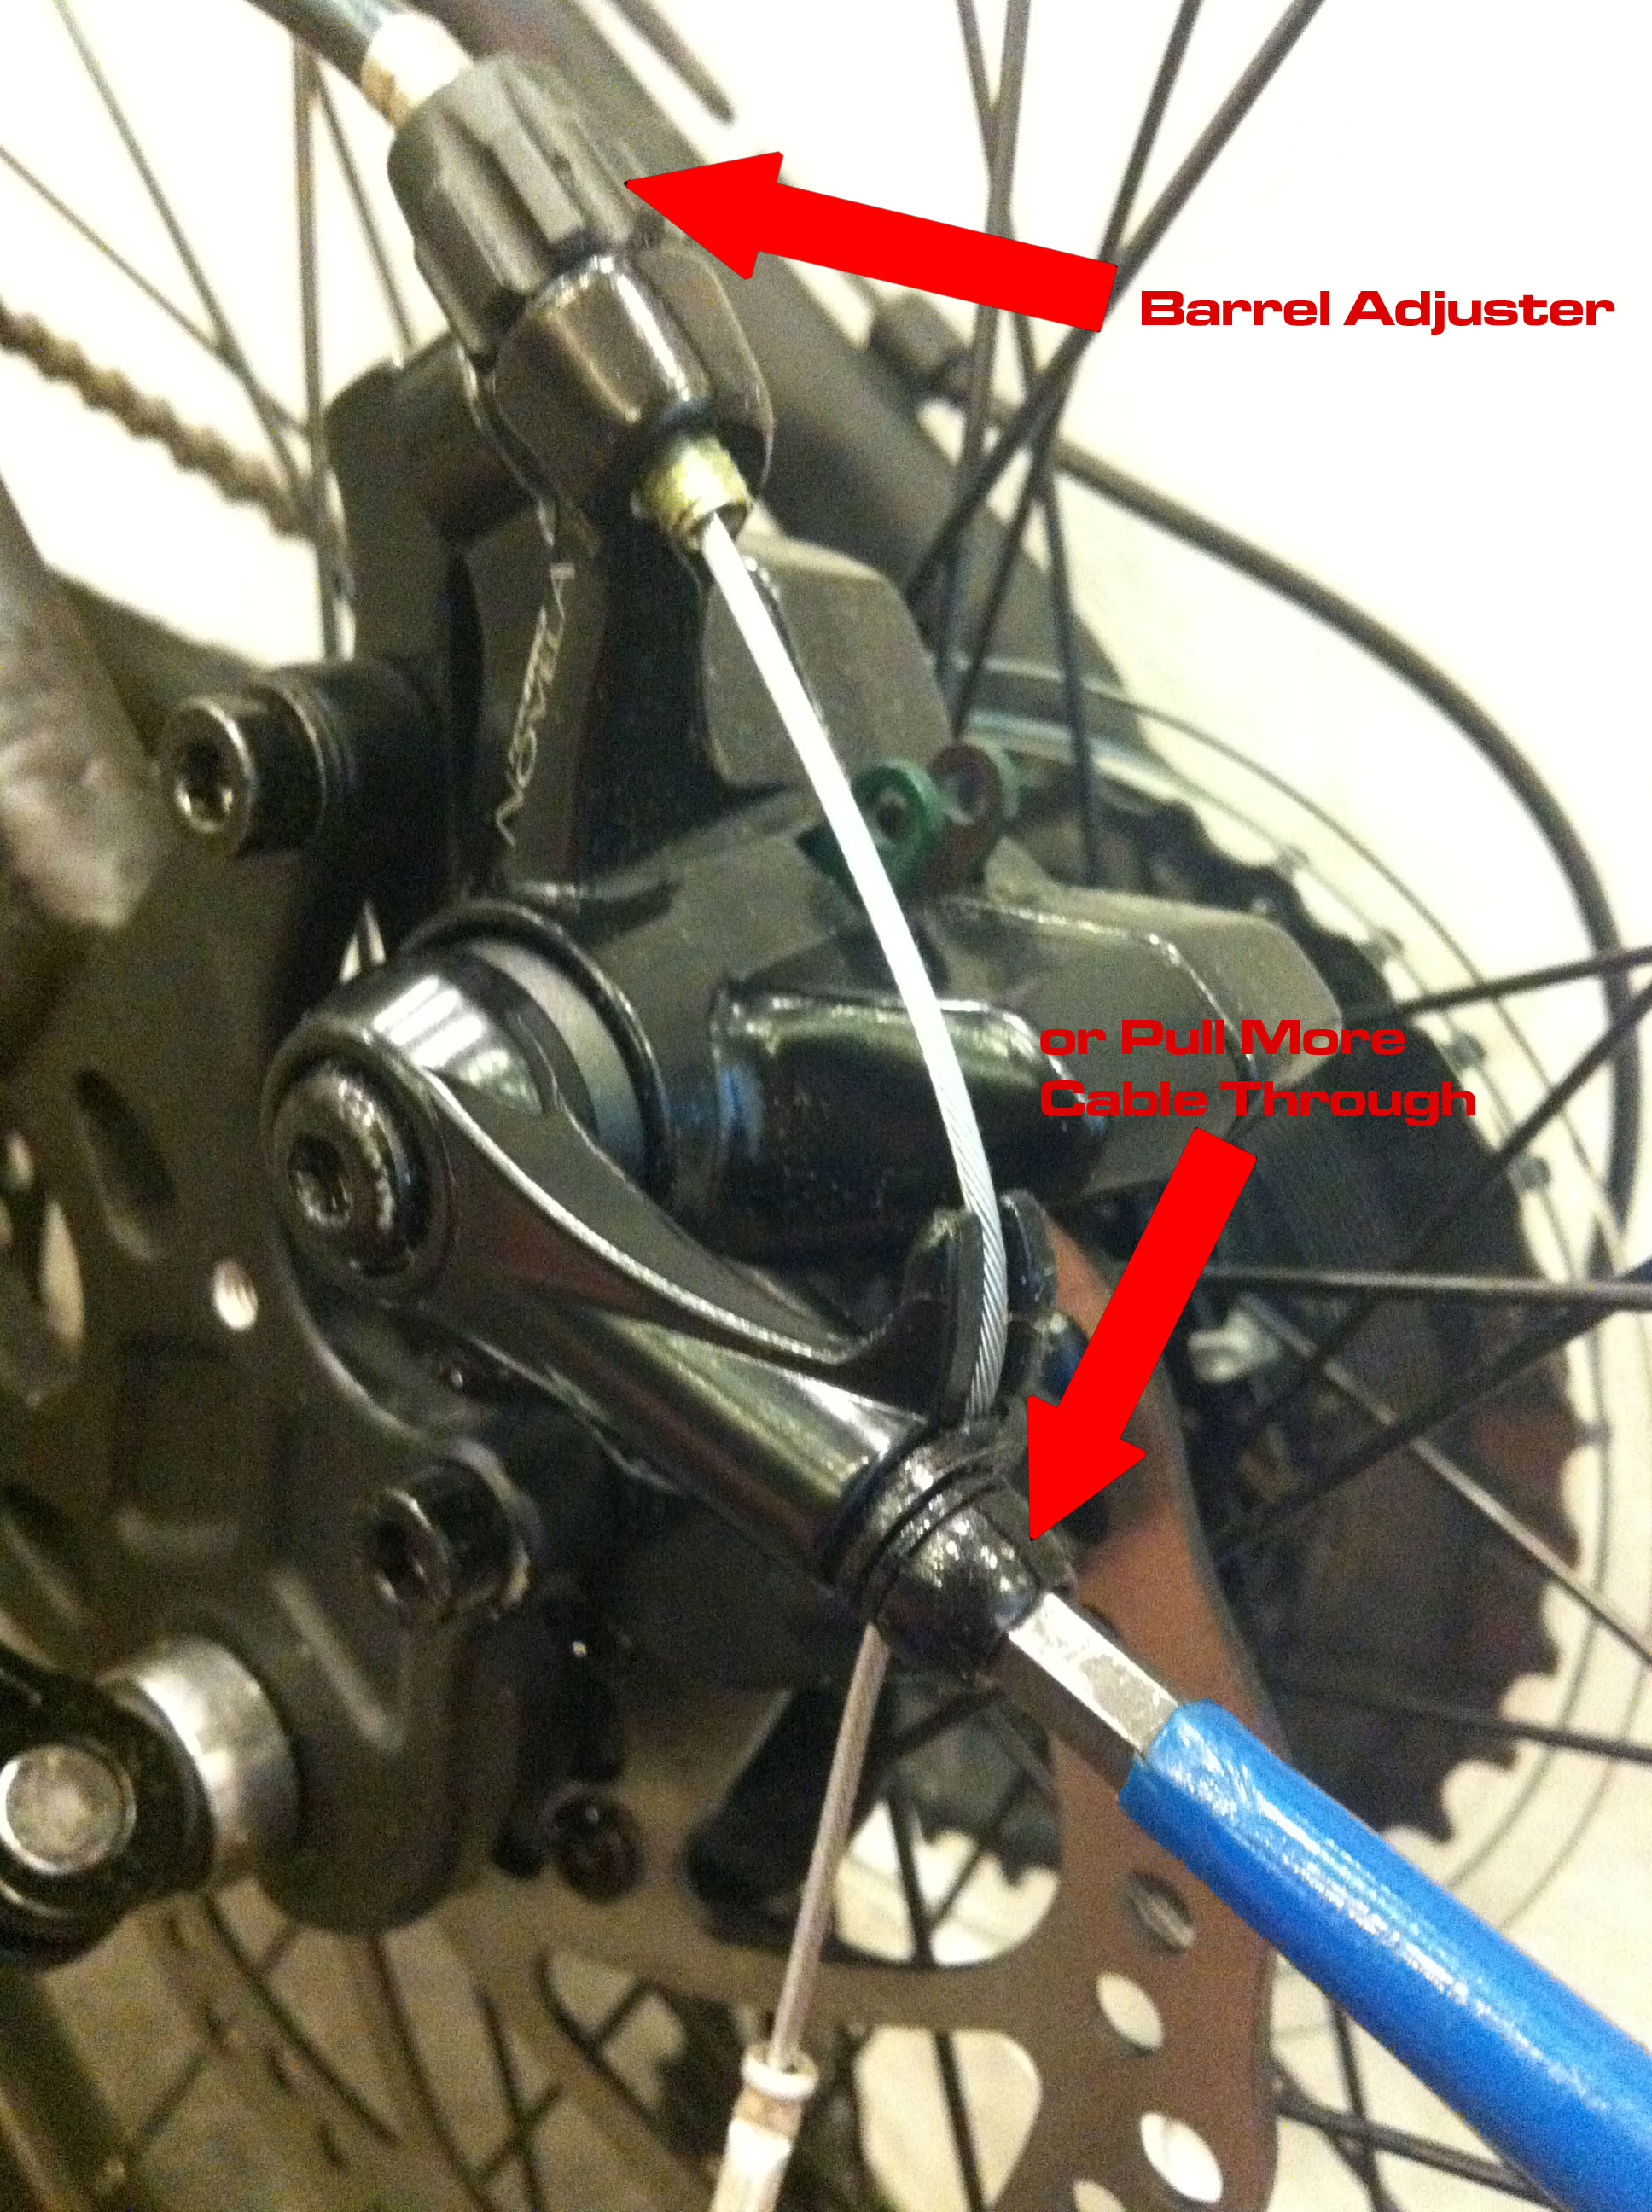
- Check the tension: Squeeze the brake lever and observe the movement of the brake caliper. If the caliper moves too little or too much, the cable tension needs adjustment.
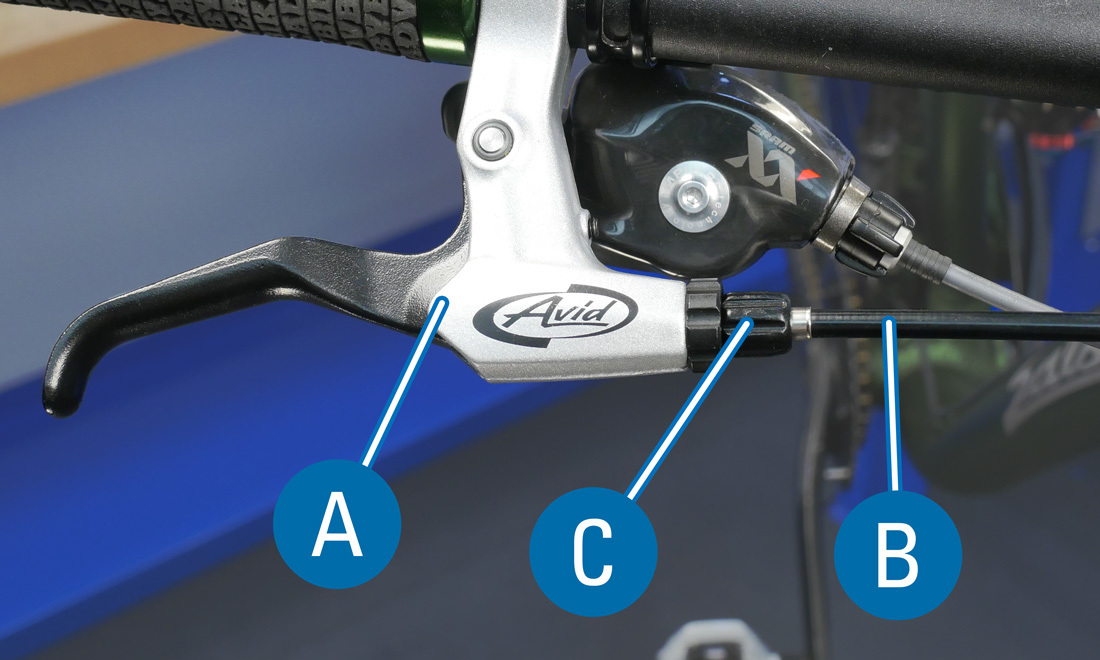
- Find the barrel adjuster: Locate the barrel adjuster on the brake lever or near the brake caliper. The barrel adjuster is used to fine-tune the cable tension.
Adjusting barrel adjuster and cable tension
Once you have checked the cable tension, you can proceed with adjusting the barrel adjuster. Follow these steps:
- Turn the barrel adjuster: If the caliper moves too little when the brake lever is squeezed, turn the barrel adjuster clockwise to tighten the cable tension. If the caliper moves too much, turn the barrel adjuster counterclockwise to loosen the tension.
- Test the brakes: After making adjustments to the barrel adjuster, squeeze the brake lever and observe the movement of the caliper. The caliper should move smoothly and provide adequate braking power.
- Fine-tune the tension: If the brakes still feel too loose or too tight, make further adjustments to the barrel adjuster until the desired tension is achieved.
Remember to test the brakes after each adjustment to ensure they are functioning properly. If you encounter significant problems or are unsure about the adjustments, it is always recommended to consult a professional bike technician for expert guidance and assistance.
By following these steps and properly adjusting the brake cable tension using the barrel adjuster, you can ensure safe and reliable braking performance on your electric bike.
Brake Pad Replacement
When to Replace Brake Pads
Ensuring the brakes on your electric bike are in good working condition is crucial for safety. One important aspect of brake maintenance is knowing when to replace the brake pads. Here are some signs to look out for:
- Worn Brake Pads: Check the brake pads for any signs of wear. If they are less than 3mm thick, it is time to replace them.
- Squealing or Squeaking Sounds: If you hear high-pitched noises while applying the brakes, it could indicate that the brake pads are worn and need replacement.
- Reduced Braking Performance: If you notice that it takes longer for your electric bike to come to a complete stop or if the braking efficiency has decreased, it is a clear sign that the brake pads need attention.
Step-by-Step Guide for Brake Pad Replacement
To replace the brake pads on your electric bike, follow these simple steps:
- Gather the Required Tools: Ensure you have a set of new brake pads and the necessary tools such as Allen wrenches, pliers, and a clean rag.
- Remove the Wheel: Use the appropriate tools to remove the wheel from which you want to replace the brake pads.
- Remove the Old Brake Pads: Locate the brake caliper and carefully remove the retaining pin or clip holding the brake pads in place. Gently slide out the old brake pads.
- Clean and Lubricate: Take a clean rag and wipe down the brake caliper, making sure to remove any debris or dirt. Apply a small amount of brake lubricant to the brake pad mounting points.
- Install the New Brake Pads: Insert the new brake pads into the caliper, ensuring they are correctly aligned. Reattach the retaining pin or clip to hold them securely in place.
- Reassemble and Test: Put the wheel back onto the electric bike and tighten any bolts or quick-release mechanisms. Test the brakes to ensure they engage properly and provide sufficient stopping power.
- Bed-In the Brake Pads: After installation, it is essential to bed-in the new brake pads. Start by gently applying the brakes and gradually increasing the intensity. Repeat this process several times to allow the brake pads to settle and provide optimal performance.
By following these steps, you can easily replace the brake pads on your electric bike and ensure safe and effective braking. Remember, if you are unsure or encounter any difficulties during the process, it is always recommended to seek assistance from a professional bike technician. They can provide expert guidance and ensure your electric bike’s brakes are in top condition for a smooth and secure riding experience.
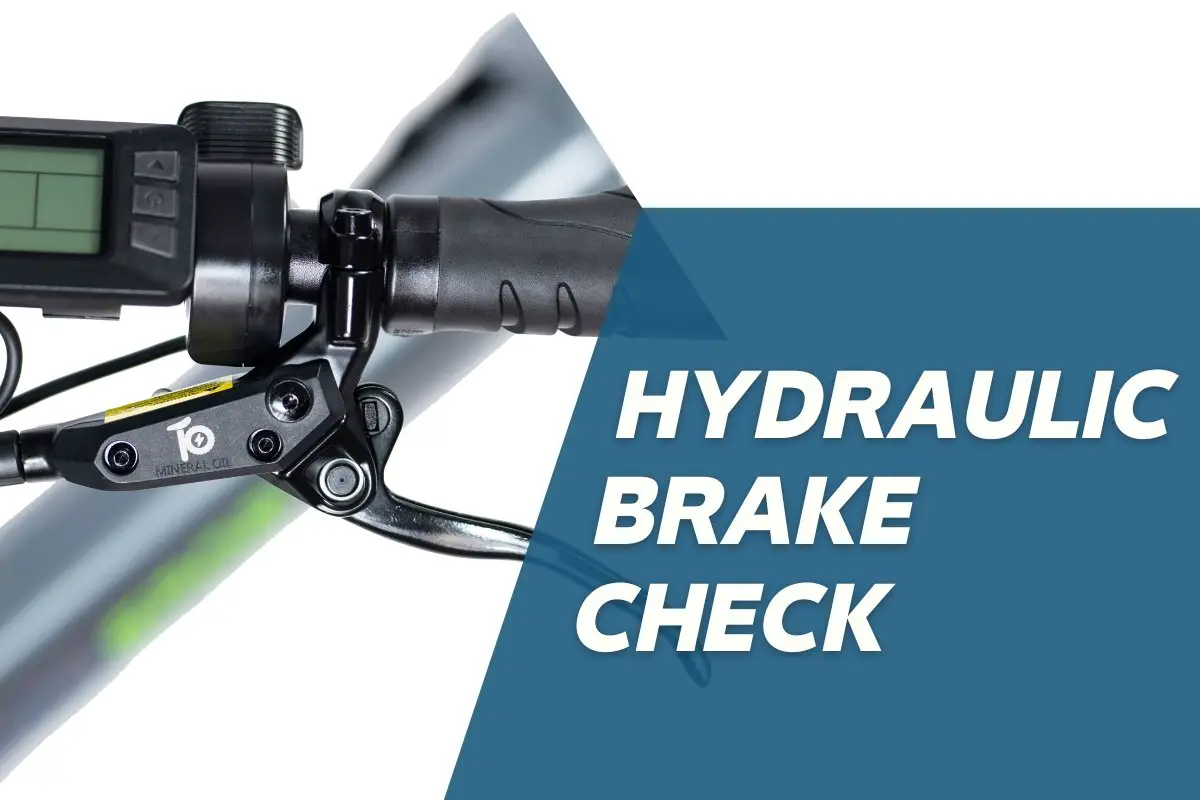
Bleeding Hydraulic Brakes (If applicable)
Understanding hydraulic brake systems
For electric bikes equipped with hydraulic brakes, understanding how the system works is essential before attempting any repairs. Hydraulic brakes utilize fluid, usually mineral oil or brake fluid, to transmit force from the brake lever to the caliper, resulting in the braking action. When the brake lever is squeezed, it pressurizes the fluid, activating the caliper and causing the brake pads to clamp onto the rotor, resulting in the bike coming to a stop.
Step-by-step guide for bleeding hydraulic brakes
- Gather the necessary tools: To bleed hydraulic brakes, you will need a bleed kit specific to your brake system, a catch tray to collect any spilled fluid, and a clean rag to wipe away any excess fluid.
- Prepare the bike: Place your electric bike in a stable position, ensuring it is not leaning or at risk of falling over during the bleeding process. This will prevent any potential accidents or damage.
- Loosen the bleed port screw: Locate the bleed port screw on the brake lever or caliper, depending on the brake system. Loosen the screw slightly using the appropriate tool, allowing any trapped air to escape.
- Attach the bleed kit: Connect the bleed kit to the bleed port screw by following the manufacturer’s instructions. Make sure all connections are secure to prevent any fluid leakage during the process.
- Bleed the system: Begin the bleeding process by slowly squeezing the brake lever multiple times. This will push the air bubbles out of the system and into the bleed kit. Keep an eye on the fluid reservoir and replenish it if necessary to maintain the correct fluid level.
- Remove air bubbles: Once you notice no more air bubbles escaping into the bleed kit, continue squeezing the brake lever to ensure all air is expelled from the system. This step may require several repetitions until the brake lever feels firm and responsive.
- Secure the bleed port screw: Once the hydraulic brake system is free of air bubbles, tighten the bleed port screw securely, ensuring no fluid can escape.
- Clean and inspect: Wipe away any spilled fluid with a clean rag, being careful not to get any fluid on other bike components. Inspect the brake system for leaks or any abnormalities before testing the brakes.
- Test the brakes: After bleeding the hydraulic brakes, take your electric bike for a test ride in a safe environment. Gradually apply the brakes to ensure they engage smoothly and provide the desired stopping power.
By following these steps, you can effectively bleed the hydraulic brakes on your electric bike, maintaining their optimal performance and ensuring a safe and enjoyable riding experience. If you are unsure or encounter any difficulties during the process, it is advisable to seek assistance from a professional bike technician to avoid any potential damage or injuries.
Troubleshooting Brake Issues
Identifying and troubleshooting common brake problems
When it comes to electric bike brakes, like any other type of brakes, issues can arise. Here are some common problems you may encounter and how to troubleshoot them:
- Squeaky Brakes: If your electric bike’s brakes are squeaking, it could be due to contamination or misalignment. Start by cleaning the brake pads and the rotor with rubbing alcohol to remove any dirt or debris. If the squeaking continues, try adjusting the alignment of the brake pads by loosening the mounting bolts and realigning them with the rotor.
- Weak Brakes: Weak brakes can be caused by various factors. First, check if the brake pads are worn out and need replacement. Additionally, ensure that the brake cables are properly tensioned and not frayed or damaged. If the brakes are still weak, it might be an issue with the braking system itself, and it is recommended to seek assistance from a professional bike technician.
- Brake Drag: Brake drag occurs when the brakes do not fully release after releasing the brake lever. One common cause is a misadjusted brake caliper. Try adjusting the caliper by loosening the mounting bolts and aligning it properly. If the problem persists, check if the brake cables are sticking or if there are any obstructions preventing the brakes from fully releasing.
Solutions for squeaky or weak brakes
To tackle squeaky or weak brakes on your electric bike, here are some additional tips:
- Use Proper Lubrication: Apply a small amount of bike-specific brake lubricant on the brake pads and rotor to reduce squeaking. Be careful not to get any lubricant on the braking surface as it can reduce braking performance.
- Upgrade Brake Pads: Consider upgrading to higher-quality brake pads that are specifically designed for your electric bike. These pads can provide better stopping power and reduce noise.
- Maintain Regular Brake Inspections: Regularly inspect your electric bike’s brakes to identify any signs of wear or damage. Replace worn-out brake pads or any damaged components promptly.
Remember, if you are not confident in troubleshooting or fixing brake issues on your electric bike, it is always advisable to seek assistance from a professional bike technician. They have the knowledge and expertise to address more complex brake problems and ensure your safety while riding.
Conclusion
Regular brake maintenance is crucial for the safety and performance of your electric bike. By properly troubleshooting and fixing brake issues, you can ensure a smooth and secure riding experience. Here are a few key points to keep in mind:
Importance of Regular Brake Maintenance
Regular brake maintenance is essential for the proper functioning of your electric bike. It helps prevent issues such as squeaky brakes, weak braking power, and brake drag. By addressing these problems promptly, you can ensure optimal safety and control while riding.
Safety Tips for Electric Bike Riders
To further enhance your riding experience and ensure safety, consider these tips:
- Regularly Inspect Your Brakes: Perform regular inspections of your electric bike’s brakes to check for any signs of wear and tear, misalignment, or damage. This allows you to catch and address potential issues early on.
- Follow Manufacturer’s Guidelines: Always refer to the manufacturer’s guidelines for brake maintenance and adjustments. These guidelines will provide you with specific instructions and best practices for maintaining your electric bike’s brakes.
- Seek Professional Assistance: If you are unsure or uncomfortable with troubleshooting and fixing brake issues, it is advisable to seek assistance from a professional bike technician. They have the knowledge and expertise to handle complex brake problems and ensure your safety.
- Upgrade Brake Components: Consider upgrading your brake pads or other brake components to improve performance and safety. Higher-quality brake pads or rotors can provide better stopping power and control.
- Practice Safe Riding Habits: Always ride defensively and follow traffic rules. Maintain a safe distance from other vehicles, use hand signals, and be aware of your surroundings. Being a responsible rider contributes to your overall safety.
Remember, proper brake maintenance and prompt troubleshooting are essential for the safe operation of your electric bike. By following these tips and regularly checking your brakes, you can enjoy a hassle-free and secure riding experience. Stay safe and happy riding!