
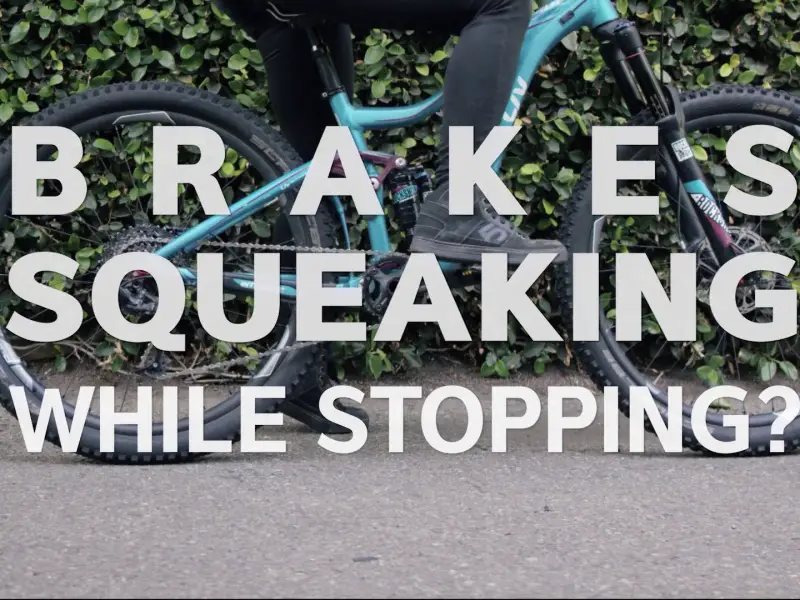
Brakes are a vital component of any bicycle, ensuring the safety and control of the rider. However, it can be quite frustrating when those brakes start squeaking every time you come to a stop. Understanding why bicycle brakes squeak when stopping and the common causes behind it can help you address the issue and enjoy a smoother and quieter ride.
Why do bicycle brakes squeak when stopping?
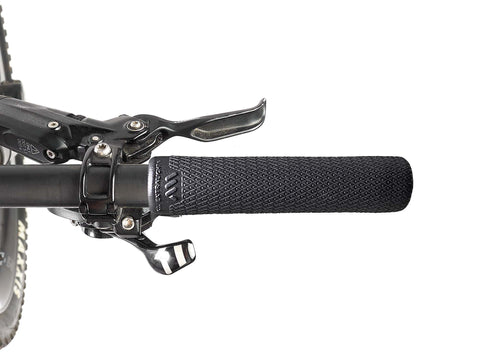
The squeaking sound you hear when applying the brakes is typically caused by vibrations that occur when certain parts of the braking system come into contact with each other. When you squeeze the brake lever, the brake pads press against the wheel rims or disc rotors, producing friction to slow down or stop the bike. However, if there are imperfections or misalignments in the braking components, it can result in vibrations and that unpleasant squeaking noise.
Common causes of squeaky bicycle brakes
There are several factors that can contribute to squeaky bicycle brakes. Here are some common causes to be aware of:
- Contaminated Brake Pads: Brake pads can accumulate dirt, debris, or oil over time, reducing their effectiveness and causing them to squeak. Cleaning or replacing the pads can often resolve the issue.
- Worn Brake Pads: As brake pads wear down, they can develop uneven surfaces or grooves that cause vibrations and squeaking. Regularly inspect and replace worn brake pads to maintain optimal performance.
- Brake Alignment: If the brakes are not properly aligned, it can result in uneven contact between the brake pads and the wheel rims or disc rotors. Adjusting the brake alignment can eliminate squeaking.
- Improper Brake Bedding: When installing new brake pads, it is essential to properly break them in through a process called “bedding.” Failing to do so can lead to squeaky brakes. Follow the manufacturer’s instructions for bedding in new brake pads.
- Weather Conditions: Wet or damp weather conditions can cause brake pads to squeak temporarily. In such cases, it is advisable to ride with extra caution and allow the brakes to dry out and regain their normal functionality.
By identifying the cause of the squeaking and addressing it promptly, you can enjoy a smoother and more enjoyable ride without the annoying noise. Remember to consult a professional bicycle mechanic if you are unsure or uncomfortable making adjustments yourself.
Brake Adjustment
Steps to adjust bicycle brakes
To address the issue of squeaky bicycle brakes, it is important to properly adjust them. Here are some steps you can follow:
- Inspect the brake pads: Check the brake pads for wear and contamination. If they are worn down or dirty, clean or replace them as necessary.
- Check brake pad alignment: Ensure that the brake pads are properly aligned with the wheel rims or disc rotors. If they are not, use the appropriate tools to adjust their position.
- Tighten or loosen brake cable: Check the tension of the brake cable. If it is too loose, tighten it, and if it is too tight, loosen it. This adjustment ensures that the brake pads make proper contact with the braking surface.
- Test the brakes: After making adjustments, test the brakes by squeezing the brake levers. Ensure that the brake pads make solid contact with the wheel rims or disc rotors and that there is no excessive squeaking or rubbing.
Importance of proper brake alignment
Proper brake alignment is crucial for optimal brake performance and safety. When the brakes are not aligned correctly, they may not provide enough stopping power, resulting in longer braking distances and potential accidents. Additionally, misaligned brakes can cause uneven wear on the brake pads, leading to premature replacement.
By taking the time to adjust your bicycle brakes properly, you can ensure smooth and quiet operation while maintaining the safety and control of your ride. If you are unsure about making adjustments yourself, it is always recommended to consult a professional bicycle mechanic. They have the expertise to fine-tune your brakes and address any issues that may arise. With well-adjusted brakes, you can enjoy a more enjoyable and worry-free cycling experience.
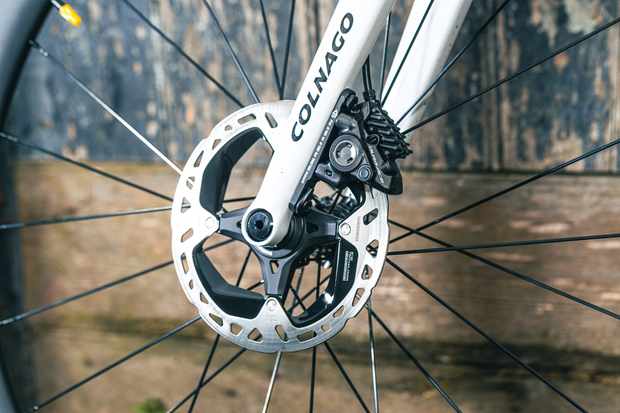
Brake Pad Issues
Bicycle brakes squeaking when stopping can be a frustrating issue for cyclists. One of the common causes of this problem is worn-out or misaligned brake pads. It is important to identify the signs of these brake pad issues and replace them to eliminate the squeaking.
Signs of worn-out or misaligned brake pads
Worn-out brake pads: Over time, brake pads can become worn down due to regular use. As they wear, the braking surface reduces, resulting in reduced braking efficiency and increased noise when stopping. You may also notice decreased responsiveness and longer braking distances. Inspect your brake pads regularly and look for signs of significant wear, such as thinning or uneven surfaces.
Misaligned brake pads: Brake pads that are not properly aligned with the wheel rims or disc rotors can cause squeaking when stopping. Misalignment can occur if the pads are not centered correctly or if they are tilted at an angle. This can result in uneven contact with the braking surface, leading to noise and reduced braking performance. Check the alignment of your brake pads and ensure they are parallel to the rim or rotor.
Replacing brake pads to eliminate squeaking
If you notice worn-out or misaligned brake pads, it is essential to replace them to eliminate the squeaking. Here are some steps you can follow:
- Remove the old brake pads: Use the appropriate tools to loosen and remove the brake pads from their holders.
- Inspect and clean the brake pad holders: Check the holders for any debris or buildup that may affect the new pads’ alignment. Clean them thoroughly if necessary.
- Install the new brake pads: Slide the new brake pads into the holders, ensuring they are properly aligned and centered. Follow the manufacturer’s instructions for proper installation.
- Adjust the brake pads: Once the new pads are installed, adjust their position for optimal contact with the braking surface. Use the appropriate tools to align them parallel to the rim or rotor.
- Test the brakes: After making the necessary adjustments, test the brakes by squeezing the brake levers. Ensure that the pads make solid contact with the rim or rotor and that there is no excessive squeaking or rubbing.
By replacing worn-out or misaligned brake pads, you can eliminate the annoying squeaking and restore optimal braking performance. If you are unsure about replacing the brake pads yourself, it is recommended to consult a professional bicycle mechanic for assistance. They can properly install and align the brake pads to ensure a quiet and efficient braking system. Enjoy your rides with smooth and silent stops!
Brake Cleaning
Steps to clean bicycle brakes
To fix the annoying issue of bicycle brakes squeaking when stopping, it is important to clean the brake pads and the braking surface. Follow these steps to effectively clean your bicycle brakes:
- Remove the wheels: Start by lifting the bicycle off the ground and removing the wheels. This will provide better access to the brake pads and the braking surface.
- Inspect the brake pads: Take a close look at the brake pads and check for any signs of wear, damage, or debris buildup. If the brake pads appear worn or contaminated, it may be necessary to replace them.
- Remove brake pads: If the brake pads are in good condition, gently remove them from the brake calipers. Pay attention to the positioning and order of the brake pads.
- Clean the brake pads: Using a stiff brush or an old toothbrush, scrub the brake pads thoroughly to remove any dirt, debris, or brake dust that may have accumulated. It is important to clean both sides of the brake pads.
- Clean the braking surface: Next, clean the surface of the rims or rotors where the brake pads make contact. Use a clean cloth dampened with isopropyl alcohol or a specialized brake cleaner to remove any contaminants.
- Inspect and clean brake calipers: While the brake pads are removed, inspect the brake calipers for any signs of wear or damage. If necessary, clean the calipers using a rag or brush to remove any dirt or grime.
- Reinstall the brake pads: Once the brake pads and braking surface are clean, carefully reinstall the brake pads into the brake calipers. Make sure they are properly aligned and secure.
- Test the brakes: Before mounting the wheels back on the bicycle, test the brakes by squeezing the brake levers. Ensure that the brake pads make solid and even contact with the braking surface. Listen for any abnormal noises or squeaking.
By regularly cleaning your bicycle brakes, you can prevent issues such as squeaking and maintain optimal braking performance. Remember to use appropriate cleaning tools and solutions recommended for your specific type of brakes. If you are unsure about any aspect of cleaning or maintaining your brakes, it is recommended to consult a professional bicycle mechanic for assistance. Enjoy smooth, silent stops on your rides!
Lubrication
Apply Proper Lubrication to Brake Components
To address the issue of bicycle brakes squeaking when stopping, proper lubrication of brake components is crucial. Here are some steps to follow to effectively lubricate your bicycle brakes:
- Identify the Brake Components: Before applying any lubricant, it is important to understand the different parts of your brake system. This includes the brake calipers, brake levers, cables, and pivot points.
- Clean the Brake Components: Before lubrication, ensure that the brake components are clean and free from dirt, debris, and old lubricant. Use a mild degreaser and a clean cloth or brush to remove any buildup.
- Choose the Right Lubricant: Selecting the appropriate lubricant is crucial to ensure proper brake performance. Look for a light, silicone-based lubricant or a dedicated bicycle brake lubricant. Avoid heavy oils or grease that can attract dirt and compromise effectiveness.
- Apply the Lubricant: Apply a small amount of lubricant to the pivot points, cables, and other moving parts of the brake system. Use a clean cloth or brush to distribute the lubricant evenly and wipe off any excess.
- Operate the Brake System: After lubricating the components, test the brake system by squeezing the brake levers. Ensure that the brakes engage smoothly without any squeaking or sticking. If necessary, repeat the lubrication process until the brakes operate effectively.
Choosing the Right Lubricant for Bicycle Brakes
When it comes to selecting the right lubricant for your bicycle brakes, there are a few factors to consider:
- Type of Brake: Different types of brakes, such as rim brakes or disc brakes, may require different lubricants. Check your brake manufacturer’s recommendations or consult a professional for guidance specific to your brake system.
- Weather Conditions: Consider the weather conditions in which you typically ride. If you often ride in wet or muddy environments, choose a lubricant that is specifically designed to resist water and dirt.
- Longevity: Some lubricants may need to be reapplied more frequently than others. Consider how often you are willing to perform maintenance and choose a lubricant that suits your desired level of maintenance.
Proper lubrication of your bicycle brakes not only helps to eliminate squeaking but also ensures smooth and reliable braking performance. Remember to follow the manufacturer’s guidelines and consult a professional if you have any concerns or questions about maintaining your bicycle brakes.
Braking Techniques
Proper braking techniques to reduce brake squeaking
When it comes to bicycle brakes squeaking when stopping, proper braking techniques can make a significant difference. Here are some tips to reduce brake squeaking and ensure smoother stops:
- Progressive Braking: Instead of squeezing the brake lever fully and abruptly, apply the brakes gradually and progressively. This technique allows the brake pads to make proper contact with the wheel surface, minimizing the chance of squeaking.
- Avoid Overheating: Excessive heat can lead to brake squeaking. Avoid prolonged braking or dragging the brakes while freewheeling downhill. This can cause the brake pads to soften and produce a high-pitched noise. Instead, use short intermittent bursts of braking to maintain control and reduce heat buildup.
- Maintain Proper Brake Alignment: Ensure that the brake pads are properly aligned with the rim or disc. Misalignment can result in uneven contact and increased friction, leading to squeaking. Regularly check and adjust the brake pads to ensure they are parallel to the rim or disc.
- Check Brake Pad Condition: Worn-out or contaminated brake pads can contribute to squeaking. Inspect the brake pads regularly and replace them if they are excessively worn or contaminated with oil, dirt, or debris. Clean the brake pads using an appropriate cleaner and sandpaper if necessary.
- Choose the Right Brake Pads: Different types of brake pads are available, each with its own characteristics. Consider using brake pads specifically designed to reduce noise, such as those made from materials like Kevlar or ceramic. These pads can provide smoother and quieter braking.
Tips for smoother and quieter stops
In addition to proper braking techniques, here are some additional tips to achieve smoother and quieter stops:
- Maintain Clean Brake Surfaces: Regularly clean the rims or discs using a mild degreaser and a clean cloth. This helps to remove any buildup of dirt, oil, or brake dust, which can contribute to squeaking.
- Ensure Proper Wheel Alignment: Misaligned wheels can affect braking performance and cause noise. Regularly check and adjust the wheel alignment to ensure they are straight and centered within the brake pads.
- Consider Brake System Upgrades: Upgrading to higher-quality brake components, such as precision-made calipers or better-quality pads, can result in smoother and quieter stops. Consult a professional or bike shop for recommendations based on your specific needs.
By implementing these proper braking techniques and following these tips, you can reduce brake squeaking and enjoy smoother, more reliable stops on your bicycle. Remember to regularly maintain and inspect your brake system to ensure optimal performance and safety.
Other Possible Causes
Identifying other potential factors causing brake squeaking
While proper braking techniques can significantly reduce brake squeaking, there may be other factors contributing to the issue. Identifying these factors is crucial to effectively address the problem. Here are some potential causes to consider:
- Loose Bolts: Loose bolts can result in vibration and noise. It’s important to regularly inspect and tighten all the bolts related to the braking system, including the caliper bolts, brake lever bolts, and mounting bolts.
- Wheel Misalignment: Misaligned wheels can cause the brake pads to make uneven contact with the rim or disc, leading to squeaking. Check the alignment of the wheels and make adjustments if necessary.
- Brake Pad Contamination: Brake pads can become contaminated with oil, dirt, or debris over time, affecting their performance and causing noise. Regularly clean the brake pads using an appropriate cleaner and sandpaper if necessary.
- Brake Pad Material: Certain brake pad materials, especially those made from harder compounds, tend to produce more noise. Consider switching to brake pads made from materials like Kevlar or ceramic, as they are designed to reduce noise while providing reliable braking power.
- Improper Bedding-in: New brake pads may require proper bedding-in to achieve optimal performance. Follow the manufacturer’s instructions for the specific brake pad model to ensure proper bedding-in and reduce potential noise.
- Worn Brake Rotors: If the brake rotors have worn unevenly or are damaged, they can contribute to brake squeaking. Inspect the brake rotors regularly and replace them if necessary.
Addressing issues such as loose bolts and wheel misalignment
To address issues such as loose bolts and wheel misalignment, follow these steps:
- Tighten Loose Bolts: Using the appropriate tools, check and tighten all bolts related to the brake system. Ensure they are securely fastened but be careful not to overtighten.
- Check Wheel Alignment: Use a straightedge or visual inspection to ensure that the wheels are properly aligned. Adjust the spoke tension or seek professional help if significant misalignment is detected.
By identifying and addressing these potential causes, you can effectively reduce brake squeaking and enjoy quieter stops on your bicycle. Regular maintenance, including proper cleaning and inspection, is key to ensuring optimal braking performance and safety.
Troubleshooting
Common troubleshooting steps for persistent brake squeaking
For bicycle riders, persistent brake squeaking can be frustrating and potentially dangerous. While proper braking techniques and maintenance can go a long way in reducing brake noise, there are common troubleshooting steps you can take to address persistent brake squeaking on your own.
- Inspect and Clean the Brake Pads: Check the brake pads for contamination or wear. If they appear dirty or glazed, remove them from the brake calipers and clean them thoroughly using an appropriate brake cleaner and sandpaper. This will help improve their grip and reduce noise.
- Check and Adjust Pad Alignment: Misaligned brake pads can cause uneven contact with the rim or disc, resulting in squeaking. Align the pads properly to ensure they make full and even contact with the braking surface.
- Replace Worn Brake Pads: If the brake pads are significantly worn or damaged, it may be time to replace them. Worn brake pads can lose their effectiveness and produce noise. Install new brake pads according to the manufacturer’s instructions.
- Inspect and Clean the Brake Rotors: Brake rotors that are contaminated, warped, or worn can contribute to brake noise. Inspect the rotors for any visible damage or build-up of debris. Clean the rotors using a suitable cleaner and sandpaper if needed.
When to seek professional help
While these troubleshooting steps can often solve brake squeaking issues, there may be cases where professional help is necessary. Consider seeking professional assistance if:
- Despite your best efforts, the brake squeaking persists or worsens.
- You are unsure about the proper alignment of brake pads or other components.
- The brake system is making abnormal sounds or exhibiting other signs of malfunction.
- You lack the necessary tools or expertise to perform more advanced repairs or adjustments.
Remember, safety should always be a priority. If you have any doubts about your ability to address the issue or if you feel uncomfortable riding with noisy brakes, it is best to consult a professional bicycle mechanic. They have the expertise and knowledge to diagnose and rectify any brake-related issues, ensuring a safe and enjoyable riding experience.
Conclusion
Persistent brake squeaking can be a frustrating and potentially dangerous issue for bicycle riders. While proper braking techniques and maintenance are important, there are common troubleshooting steps that can be taken to address this problem. By following these steps, riders can maintain noise-free bicycle brakes and ensure a safe and enjoyable riding experience.
Maintaining noise-free bicycle brakes
To address persistent brake squeaking, riders can perform the following troubleshooting steps:
- Inspect and Clean the Brake Pads: Check for contamination or wear on the brake pads. Cleaning them thoroughly using appropriate brake cleaner and sandpaper can improve their grip and reduce noise.
- Check and Adjust Pad Alignment: Misaligned brake pads can cause uneven contact with the rim or disc, resulting in squeaking. Properly align the pads to ensure full and even contact with the braking surface.
- Replace Worn Brake Pads: If the brake pads are significantly worn or damaged, it may be time to replace them. Worn brake pads can lose their effectiveness and produce noise. Install new brake pads according to the manufacturer’s instructions.
- Inspect and Clean the Brake Rotors: Contaminated, warped, or worn brake rotors can contribute to brake noise. Inspect the rotors for any visible damage or debris build-up. Clean them using a suitable cleaner and sandpaper if necessary.
Final thoughts and recommendations
While these troubleshooting steps can often solve brake squeaking issues, there may be cases where professional help is necessary. Riders should consider seeking professional assistance if the squeaking persists or worsens despite their best efforts, if they are unsure about proper component alignment, if the brake system exhibits other signs of malfunction, or if they lack the necessary tools or expertise for advanced repairs.
Safety should always be a priority, and if riders have any doubts or discomfort regarding noisy brakes, it is best to consult a professional bicycle mechanic. These experts have the knowledge and expertise to diagnose and rectify any brake-related issues, ensuring a safe and enjoyable riding experience. By following these guidelines and seeking professional help when needed, riders can maintain noise-free bicycle brakes and enhance their overall riding experience.