
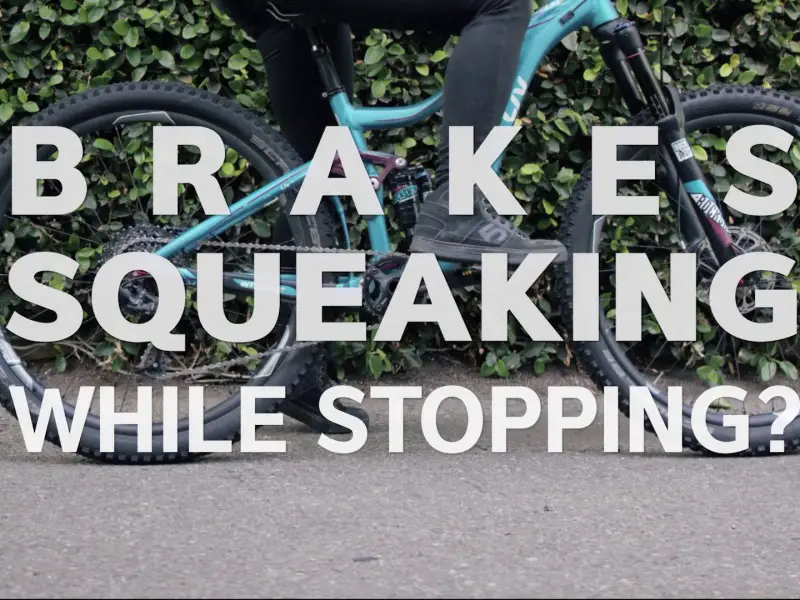
Squeaky brakes on a bike can be irritating and also a cause for concern. Not only do they affect the smoothness of your ride, but they can also be a sign of underlying issues that need attention. In this section, we will explore the common causes of squeaky brakes on a bike and highlight the importance of fixing them promptly.
Common Causes of Squeaky Brakes on a Bike
There are several reasons why the brakes on your bike might squeak. Understanding these causes can help you identify and resolve the issue effectively. Here are some common causes:
- Contaminated Brake Pads: Dust, debris, or oil can accumulate on the brake pads, causing them to produce a squeaky sound when applied.
- Misaligned Brake Pads: If the brake pads are not properly aligned with the rim or the disc, they can create vibrations that result in a squeaky noise.
- Worn Brake Pads: Over time, brake pads can wear down, causing them to make noise as they come into contact with the braking surface.
- Glazed Brake Pads: Excessive heat from prolonged braking can cause the brake pads to harden and develop a glazed surface, leading to squeaking.
The Importance of Fixing Squeaky Brakes
Fixing squeaky brakes on your bike is crucial for several reasons:
- Safety: Squeaky brakes can be a sign of reduced braking efficiency. This can compromise your ability to stop quickly or handle emergency situations, putting your safety at risk.
- Smooth Ride: Squeaky brakes can be annoying and disrupt the overall enjoyment of your bike ride. Fixing the issue will result in a smoother and quieter ride.
- Long-Term Damage Prevention: Ignoring squeaky brakes can lead to further damage to the bike’s braking system. Addressing the issue promptly can prevent costly repairs down the line.
Tips to Fix Squeaky Brakes on a Bike
Now that you understand the importance of fixing squeaky brakes, here are some tips to help you resolve the issue:
- Clean the Brake Pads: Remove the brake pads from the bike and clean them thoroughly with an alcohol-based cleaner. This will remove any contaminants that may be causing the squeaking.
- Align the Brake Pads: Ensure that the brake pads are properly aligned with the rim or disc. They should have even contact and no rubbing against the tire or other brake components.
- Replace Worn Brake Pads: If the brake pads are significantly worn down, it is recommended to replace them with new ones to restore optimal braking performance.
- Resurface Glazed Brake Pads: If the brake pads have developed a glazed surface, use sandpaper or a file to lightly roughen the surface. This will improve the pad’s grip and reduce squeaking.
- Check and Adjust Cable Tension: Ensure that the brake cables are properly tensioned. Loose or overly tight cables can cause squeaky brakes.
Remember, if you are unsure or uncomfortable with performing the necessary repairs, it is always best to consult a professional bike mechanic for assistance.
Fixing squeaky brakes on a bike is essential for safety, a smooth ride, and to prevent further damage. By understanding the common causes and following these tips, you can address the issue effectively and enjoy a quiet and reliable braking experience on your bike.
Inspection and Cleaning
When it comes to fixing a squeaky brake on a bike, it is essential to start with a thorough inspection and cleaning of the brake pads and rim surface. By addressing any issues in these areas, you can effectively eliminate the squeaky noise and restore optimal braking performance.
Inspecting Brake Pads and Rim Surface
Begin by examining the brake pads for any signs of contamination, misalignment, excessive wear, or glazing. Check if there is any dirt, debris, oil, or residue on the brake pads or rim surface. Misaligned brake pads can cause vibrations that result in a squeaky noise, while worn brake pads or glazed surfaces can lead to improper contact and noise during braking.
Cleaning the Brake Pads and Rim Surface
To clean the brake pads and rim surface, you will need an alcohol-based cleaner and a brush or cloth. Remove the brake pads from the bike and use the cleaner to thoroughly clean both sides of the pads. Ensure that you remove any dirt, debris, or residue.
Next, clean the rim surface using the same cleaner and cloth or brush. Make sure to remove any contaminants that might be affecting the braking performance. Pay close attention to the area where the brake pads make contact with the rim.
If the brake pads have developed a glazed surface, lightly roughen the surface using sandpaper or a file. This will improve the pad’s grip and reduce squeaking.
After cleaning and inspecting the brake pads and rim surface, carefully reinsert the pads into their original position. Ensure that they are aligned properly with the rim or disc and have even contact. There should be no rubbing against the tire or other brake components.
It is also crucial to check and adjust the cable tension. Loose or overly tight cables can cause squeaky brakes. If needed, consult a professional bike mechanic for assistance in adjusting the cable tension.
Remember, if you are unsure or uncomfortable with performing the necessary repairs, it is always best to seek professional help. A qualified bike mechanic can provide expert advice and ensure the proper functioning of your bike’s braking system.
Fixing squeaky brakes on a bike involves a thorough inspection and cleaning of the brake pads and rim surface. By carefully examining and cleaning these areas, addressing any misalignment or glazing, and adjusting cable tension if necessary, you can eliminate the squeaky noise and enjoy a quiet and reliable braking experience on your bike.
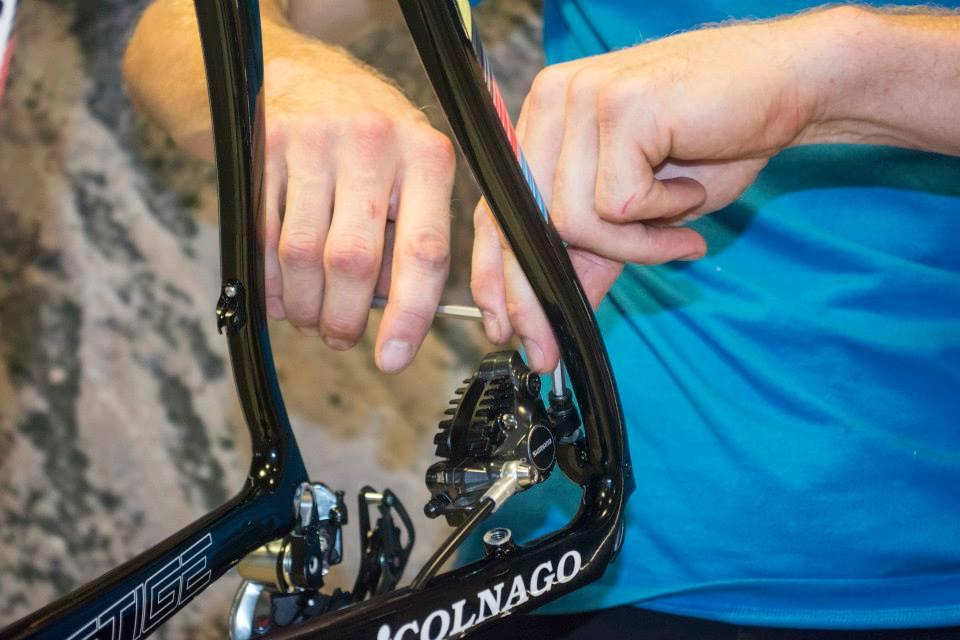
Adjustments and Alignment
When it comes to fixing a squeaky brake on a bike, it is essential to address not only the inspection and cleaning of the brake pads and rim surface but also the adjustments and alignment of the brake system. By ensuring proper alignment and tension, you can eliminate the squeaking noise and restore optimal braking performance. Here, we will explore how to inspect brake alignment and adjust the brake cable tension and position.
Inspecting Brake Alignment
Begin by examining the overall alignment of the brake system. Check if the brake calipers are properly aligned with the rim and if there is any wobbling or misalignment. Misaligned brakes can cause vibrations that result in a squeaky noise during braking.
To check the alignment, squeeze the brakes and observe the contact between the brake pads and the rim. Ideally, the brake pads should make even and parallel contact with the rim on both sides. If there is any uneven contact or misalignment, adjustments will be necessary.
Adjusting Brake Cable Tension and Position
The next step is to adjust the brake cable tension and position. Start by locating the barrel adjuster on the brake caliper or brake lever. Turning the barrel adjuster clockwise will increase the tension, while turning it counterclockwise will decrease the tension.
Begin by loosening the brake cable tension by turning the barrel adjuster counterclockwise. This will create some slack in the cable. Next, squeeze the brake lever and observe the position of the brake pads. They should move towards the rim without excessive force or hesitation.
If there is too much slack in the cable or if the brake pads do not move smoothly, tighten the cable tension by turning the barrel adjuster clockwise. Continue adjusting the tension until the brake pads engage the rim with the desired responsiveness and without any squeaking noise.
Additionally, ensure that the brake pads are properly positioned on the rim. They should make full contact with the braking surface without rubbing against the tire or other brake components. Adjust the position of the brake pads if needed by loosening the fixing bolt and aligning them properly before tightening the bolt.
It is important to note that proper adjustment of the brake cable tension and position may require trial and error. It is recommended to make small adjustments and test the brakes repeatedly to achieve the desired result.
Fixing a squeaky brake on a bike involves not only the inspection and cleaning of the brake pads and rim surface but also adjustments and alignment of the brake system. By inspecting the brake alignment and adjusting the brake cable tension and position, you can eliminate the squeaking noise and enjoy a quiet and reliable braking experience on your bike. If you are unsure or uncomfortable with performing these adjustments, it is best to seek professional help from a qualified bike mechanic to ensure the proper functioning of your bike’s braking system.

Lubrication and Maintenance
When it comes to fixing a squeaky brake on a bike, adjustments and alignment play a crucial role. However, another essential aspect of maintaining optimal brake performance is proper lubrication and regular maintenance. By taking these steps, you can prevent future squeaks and ensure a smooth and reliable braking experience. Here, we will explore how to apply lubrication to brake components and provide some maintenance tips for preventing future squeaks.
Applying lubrication to brake components
One of the main causes of a squeaky brake is friction between the brake pads and the rim. Applying lubrication to the appropriate components can significantly reduce this friction and eliminate the annoying noise. Here’s how you can do it:
- Start by cleaning the braking surface of the rim and the brake pads. Remove any dirt, debris, or residue buildup that may be affecting their performance. Use a clean cloth or a mild solvent if necessary.
- Next, inspect the brake calipers and the brake pad holders. Apply a small amount of lubricant or grease to the contact points between the brake pad holders and the caliper arms. This will ensure smooth movement and reduce any potential squeaking caused by metal-to-metal contact.
- Additionally, check the brake pivots and apply a thin layer of lubricant to these areas. The pivots should move freely without any stiffness or resistance.
- Finally, lightly coat the braking surface of the rim with a specific rim lubricant or a light oil. Be cautious not to apply too much lubrication, as it can cause a decrease in braking performance. Spread the lubricant evenly using a clean cloth or your fingertips.
By properly lubricating these key brake components, you can reduce friction, eliminate squeaks, and maintain optimal braking performance.
Regular maintenance tips for preventing future squeaks
Aside from lubrication, regular maintenance is essential to prevent future squeaks and maintain the overall performance of your bike’s braking system. Here are some tips to keep in mind:
- Keep your bike clean: Regularly clean your bike, paying particular attention to the braking components. Remove any dirt, debris, or grime that may accumulate and affect the brake’s effectiveness.
- Check brake pad wear: Periodically inspect the brake pads to ensure they have sufficient thickness. Worn-out brake pads can cause squeaks and hamper braking performance. Replace them as needed.
- Adjust brake tension: Ensure that the brake cable tension is properly adjusted. Too much or too little tension can result in poor brake performance and potential squeaks. Consult your bike’s manual for precise adjustment instructions.
- Inspect and maintain the brake cables: Check the brake cables regularly for any signs of fraying, kinks, or damage. Replace them if necessary. Lubricate the cables periodically to ensure smooth movement.
- Test your brakes: Before every ride, test your brakes to make sure they are functioning correctly. Squeeze the brake levers and check for responsiveness and any abnormal noises.
By following these maintenance tips and addressing any issues promptly, you can prevent future squeaks and ensure a safe and enjoyable biking experience.
Fixing a squeaky brake on a bike requires not only adjustments and alignment but also proper lubrication and regular maintenance. By applying lubrication to the appropriate components and following regular maintenance tips, you can prevent future squeaks, maintain optimal brake performance, and enjoy a smooth and reliable braking experience on your bike. Remember to consult a professional if you are unsure or uncomfortable performing these tasks to ensure the proper functioning of your bike’s braking system.
Advanced Troubleshooting
Checking for loose bolts and components
When it comes to fixing a squeaky brake on a bike, you might need to perform advanced troubleshooting techniques to identify and resolve the issue. One common culprit for squeaky brakes is loose bolts and components. Here’s how you can check for and address these:
- Inspect the brake assembly: Start by visually examining the brake assembly, including the brake calipers, brake pad holders, and brake arms. Look for any signs of looseness or misalignment.
- Tighten bolts and fasteners: Use a wrench or an appropriate tool to tighten any loose bolts and fasteners in the brake assembly. Make sure to check the brake caliper bolts, brake pad holder bolts, and even the bolts on the brake levers. Ensure they are secured tightly but be cautious not to overtighten.
- Realign brake components: If you notice any misalignment in the brake calipers or brake arms, you may need to realign them. Loosen the bolts slightly, then adjust the positioning of the calipers or arms, making sure they are centered and aligned with the rim. Once aligned, tighten the bolts securely.
- Check for play: Test the brake levers to ensure there is no excessive play or movement. If you feel any looseness, adjust the cable tension using the barrel adjuster on the brake lever or the cable clamp at the brake caliper.
Examining brake pads for wear and replacement
Another potential cause of squeaky brakes is worn-out brake pads. Over time, brake pads can become thin and ineffective, resulting in noise and reduced braking performance. Here’s how you can examine and replace brake pads if necessary:
- Inspect brake pad thickness: Carefully examine the brake pads to determine their thickness. Most brake pads have wear indicators that show when they need to be replaced. If the pads are worn close to the indicator line or are significantly thinner, it’s time to replace them.
- Remove the worn brake pads: Depending on your bike’s brake system, you may need to remove a retention pin or release a brake pad holder to take out the worn brake pads. Follow the manufacturer’s instructions or consult a professional if you’re unsure.
- Install new brake pads: Ensure you have the correct replacement brake pads for your specific brake system. Align the new pads with the caliper arms or pad holders and secure them in place. Double-check that they are properly aligned with the rim and that there is no excessive toe-in or toe-out.
- Bed-in the new brake pads: After installing new brake pads, it’s essential to bed them in for optimal performance. This involves gradually applying moderate pressure to the brakes while riding, allowing both the pads and the rim to break into each other. This process will help increase braking power and reduce noise.
Remember, if you are unsure or uncomfortable performing advanced troubleshooting or replacing brake pads, it’s always wise to consult a professional bicycle mechanic. They can ensure proper diagnosis and resolution of any brake issues, ensuring your safety and the longevity of your bike’s braking system.
Advanced troubleshooting techniques are sometimes necessary when fixing a squeaky brake on a bike. Checking for loose bolts and components, as well as examining brake pads for wear and replacement, can help address the issue. Remember to tighten any loose bolts, align the brake components properly, and replace worn brake pads if necessary. If in doubt, consult a professional for assistance. By taking these steps, you can enjoy a quiet and reliable braking experience on your bike.
Conclusion
Fixing a squeaky brake on a bike can be a frustrating experience, but with the right knowledge and techniques, it is definitely possible to resolve the issue. By following a few simple steps, you can get your brakes working smoothly and enjoy a quiet and reliable braking experience.
Testing and Ensuring Squeak-Free Brakes
After performing advanced troubleshooting techniques and addressing issues like loose bolts and worn brake pads, it’s important to test your brakes to ensure they are squeak-free. Here are some steps to follow:
- Take the Bike for a Test Ride: After tightening any loose bolts and replacing worn brake pads, take your bike for a test ride. Pay attention to any unusual squeaking or rubbing sounds from the brakes. Apply the brakes gently to test their responsiveness and ensure they engage smoothly without any noise.
- Check for Proper Alignment: During the test ride, observe if the brake calipers and brake arms are aligned with the rim properly. Misalignment can cause rubbing and squeaking noises. If you notice any misalignment, stop and make necessary adjustments to realign the brake components.
- Apply Brake Lubricant: If you still experience squeaking after tightening bolts and replacing brake pads, consider applying some brake lubricant. This can help reduce friction and eliminate any remaining squeaks. Always use a lubricant specifically designed for brakes and follow the manufacturer’s instructions.
Additional Resources and Recommendations
If you encounter persistent squeaking or if you are unsure about performing advanced troubleshooting techniques on your own, it is recommended to seek assistance from a professional bicycle mechanic. They have the experience and expertise to diagnose and resolve any brake issues effectively.
Additionally, there are various online resources and forums where you can find additional tips and advice on fixing squeaky brakes. These resources can provide step-by-step instructions, video tutorials, and troubleshooting guides to help you address specific brake issues.
Remember, ensuring the proper functioning of your bike’s brakes is crucial for your safety. Regular maintenance and inspections can help prevent brake problems from occurring in the first place. By keeping your brakes clean, lubricated, and properly adjusted, you can enjoy a smooth and silent ride.
In conclusion, addressing a squeaky brake on a bike requires advanced troubleshooting techniques such as checking for loose bolts and components and examining brake pads for wear and replacement. By following the steps mentioned and testing your brakes, you can resolve the issue and enjoy a quiet and reliable braking experience. Don’t hesitate to seek professional help or consult online resources for further guidance. Safe and happy riding!